
The March Brown Floating Nymph
Hook: Firehole #633 Nymph/Wet Hook Size 12
Thread: Brown 6/0
Wing: Brown Deer body Hair
Tail: Pheasant tail fibers
Body: Possum, Fox and Ice dub Mix
Legs: Brown Partridge fibers
Spring has arrived in the Catskills, and that means the hatches are coming!

This also means that many mayflies which are in the process of emerging.. just aren’t going to make it.

They’ll either get stuck in that shuck and drown in the film, or become picked off by a hungry trout. This is why emerging flies are so effective when fished with a little movement, or even just a slight twitch in the line every so often.
The floating nymph has been around for quite a number of years, but the first time this pattern was brought to my attention was while reading “The Dettes: A Catskill Legend” by Eric Leiser. Its an excellent book, loaded with history and trout patterns. You can read more about my review of the book “here” and be sure to stop by to see Bryn and Joe at Dette Trout Flies to grab a copy the next time you’re in Roscoe!
The March Brown Floating Nymph: Creating the wing
Start your thread about one eye length behind the eye. Take 5 or 6 thread wraps, and then select a small clump of brown deer body hair.


Stack your deer hair to align the tips, then get ready to tie in the wing.

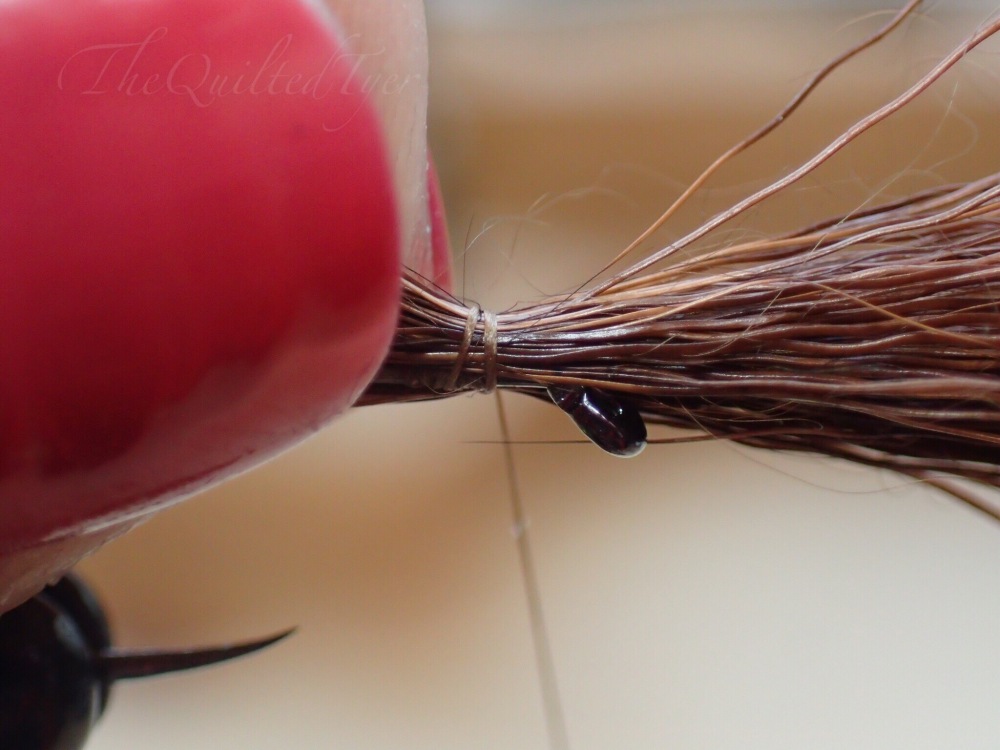
Once you have the wing secured you are going to need to prop it up. If you were to leave it like this, it will begin to fall down onto the hook shank. Not only will that make it harder to wrap the materials under it, it will also hinder it from floating properly.
In order to do this, you will take wraps around the base of the wing.
Once you have the wing secured and propped, hold the waste ends that hang over the eye up, and bring the thread to the front of the eye. Take a number of wraps here, as it will push the waste ends up and keep them off of the eye itself.


With the waste ends now secured, you can snip the butt ends off at an angle.


Creating the tail:
Grab a hold of a few pheasant tail fibers and tie them in at the base of the hook shank right before it begins to bend.
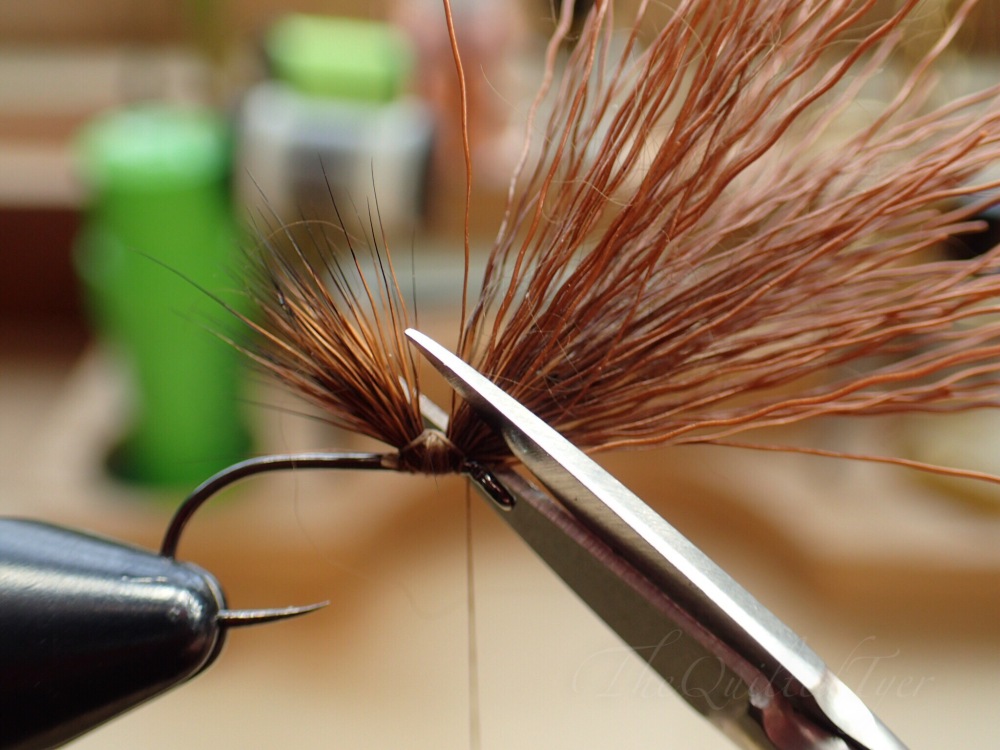
Creating the body of your fly.
The dubbing originally used in this fly was beige brown fox fur, but I have used a mixture of possum, fox and ice dub here.

Here’s where that regal comes in handy! There are many flies that are tricky to tie without a rotary vise and this is surely one of them. Create your dubbing noodle, then rotate your vise upside down and get ready to create the body.


Bring that dubbing noodle under the wing, and then straight up in the air before repeating. Continue wrapping in this way, being careful not to mat down the wing; until the body is completely dubbed.


Adding the legs:
This is a great fly to use up some of those “not so perfect” partridge feathers. Since we are only using it for legs on this fly, I normally find myself scanning the floor or the scrap bin for one.


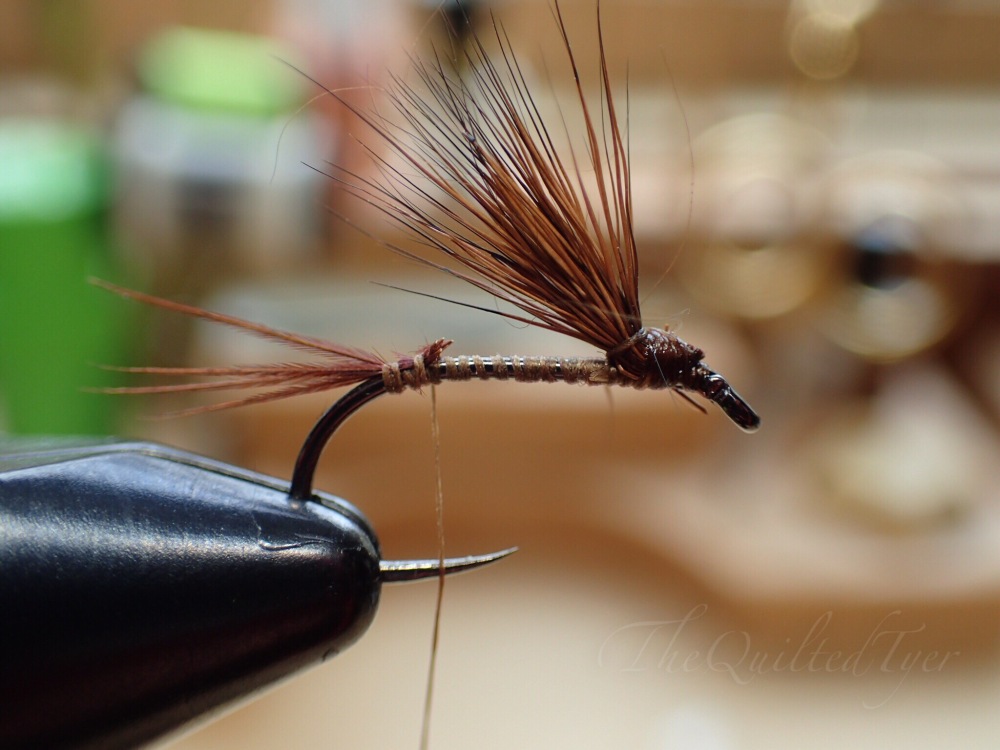
Fly complete!

This is a great fly to fish during a hatch and you can change the coloration and size to match whats hatching in your area.
It’s good to be back to these tutorials now that we have unpacked and settled into the new home!
Happy Tying!

Where do I purchase the brown fox dub ?
LikeLiked by 1 person
I can put up a link in a few hours for you for purchasing!
LikeLike
I tried to find a direct link to it but I cant seem to find one since its not specific. I had a small patch of brown fox fur which i snipped a piece off of and used the underfur mixed with possum and ice dubbing. If you have a brown dubbing that matches whats in your area you could substitute it.
LikeLike